Today as more and more traffic continues to move to a encrypted world you might think that traditional NSM (Network Security Monitoring) has gone out the window. There is a good deal of truth to that and that has made things like metadata analysis with things like JA3 tags more necessary some others have moved to jumping in line and decrypting traffic instead as their preferred option to retain visibility in this new world. This is often accomplished in larger enterprise environments, but what if you’d like to do it in your lab environment or home network. Well using Opnsense and sslsplit you can.
I’m going to be using the Opnsense as the firewall/router appliance of choice. Its a fork of the popular pfSense project. A few choices that they have made make this easier on their software than on pfSense, but with enough BSD chops you can likely pull it off on either platform. First you’ll need to compile sslsplit on your Opnsense system. To begin with get git and gmake installed on your Opnsense system.
pkg install git-2.25.1
pkg install gmake
*hint, your vesion of git may vary in the future, adjust for the current version.*
Clone the sslsplit repo
https://github.com/droe/sslsplit
After this cd into the sslsplit directory and compile the source:
make
make test       # optional unit tests
make sudotest   # optional unit tests requiring privileges
make install    # optional install
You’ll need to create an SSL cert for intercepting the traffic. You can generate the certificate via openssl on the command line if you are comfortable, or use the Opnsense GUI as shown in the squid proxy ssl documentation here: https://docs.opnsense.org/manual/how-tos/proxytransparent.html
In my case I used the GUI following the above documentation and then downloaded and re-uploaded them using SCP to a folder elsewhere on the system (I’ve no idea where opnsense store these certs, I’ve looked) You can download the certs from the GUI under System -> Trust -> Authorities.
After doing that also in the above linked opensense documentation they show setting the NAT port forward to send all 443/HTTPS traffic to a new port for decryption. We’ll be doing that here as well, and use the ports listed in the documentation as well.

Now you’ll also need to take the SSL cert and install it in the root trust store of your endpoint that you want to decrypt. Here we’ll walk through on current windows 10.
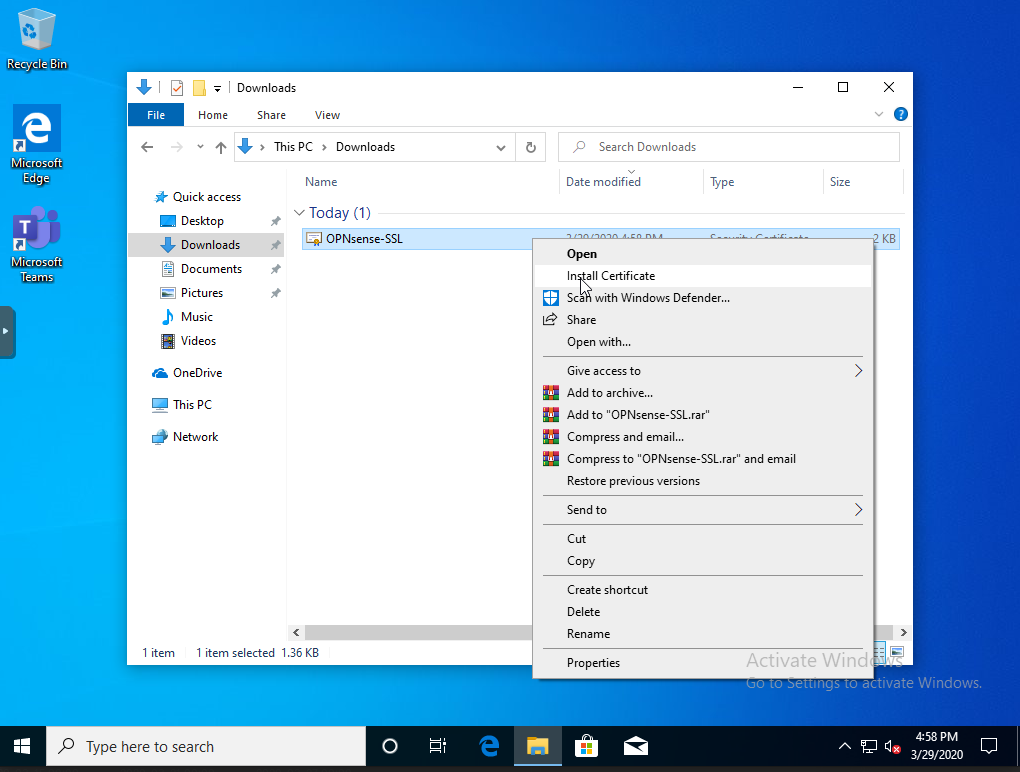
Download the cert to the local machine and right click and select install cert:
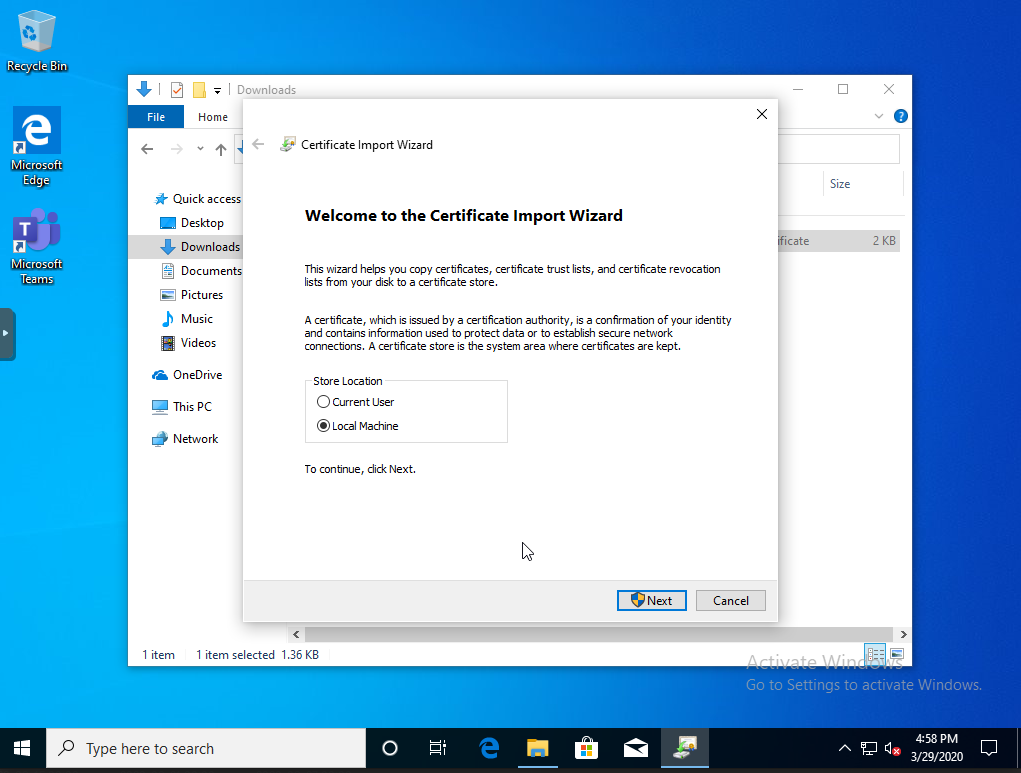
Make sure to change from installing for current user to Local Machine and prepare to enter administrator credentials so the certificate is installed for all users on the machine.
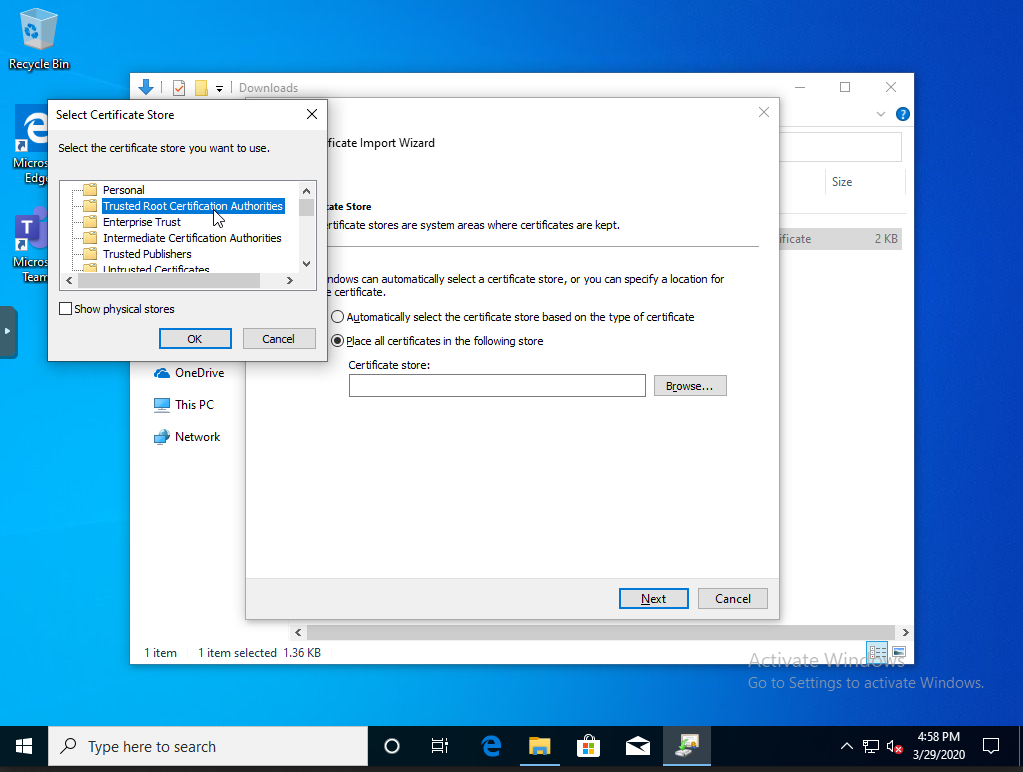
Next change from the automatic selection to place the cert specifically into the Trusted Root Cert Authorities store.
Continue clicking through the prompts and complete the install. Also make sure to close and reopen any browser as they may not see the new cert until this is done.
Now everything is installed we need to spin up the sslsplit process on Opnsense. You can do this one of two ways, first we’ll do it interactively recommended while testing.
sslsplit -k OPNsense-SSL.key -c OPNsense-SSL.crt -P -D -I eth1 -T 192.168.10.1 -l connections.log https 0.0.0.0 3129
Let’s digest the command line above the -k and -c specify the SSL cert and key you generated earlier. -P will allow pass through of connections rather drop ssl that cannot be intercepted, this would apply to sites that use certificate pinning. -D debug mode, everything get output to screen. -I will replay the traffic to the interface selected. -T is required as well if you are replaying the traffic to an interface, this is the IP of the interface traffic is replayed too. -l log to write connections to. During debug this will be empty. If it starts successfully then you should start to see traffic be intercepted and displayed on screen.
This is fine for testing but for full time running we’ll want to write a config and Daemonize the process. You’ll need to write a config file, here’s an example one.
CAKey /path/to/cert/OPNsense-SSL.key
CACert /path/to/cert/OPNsense-SSL.crt
Passthrough yes
Daemon yes
MirrorIf eth1
MirrorTarget 192.168.10.1
ConnectLog connections.log
Chroot /tmp/sslsplit
ProxySpec https 0.0.0.0 3129
The above mirrors basically every option we applied before except it will be running in the background. Save your file and then call it via the -f option:
sslsplit -f decrypt.conf
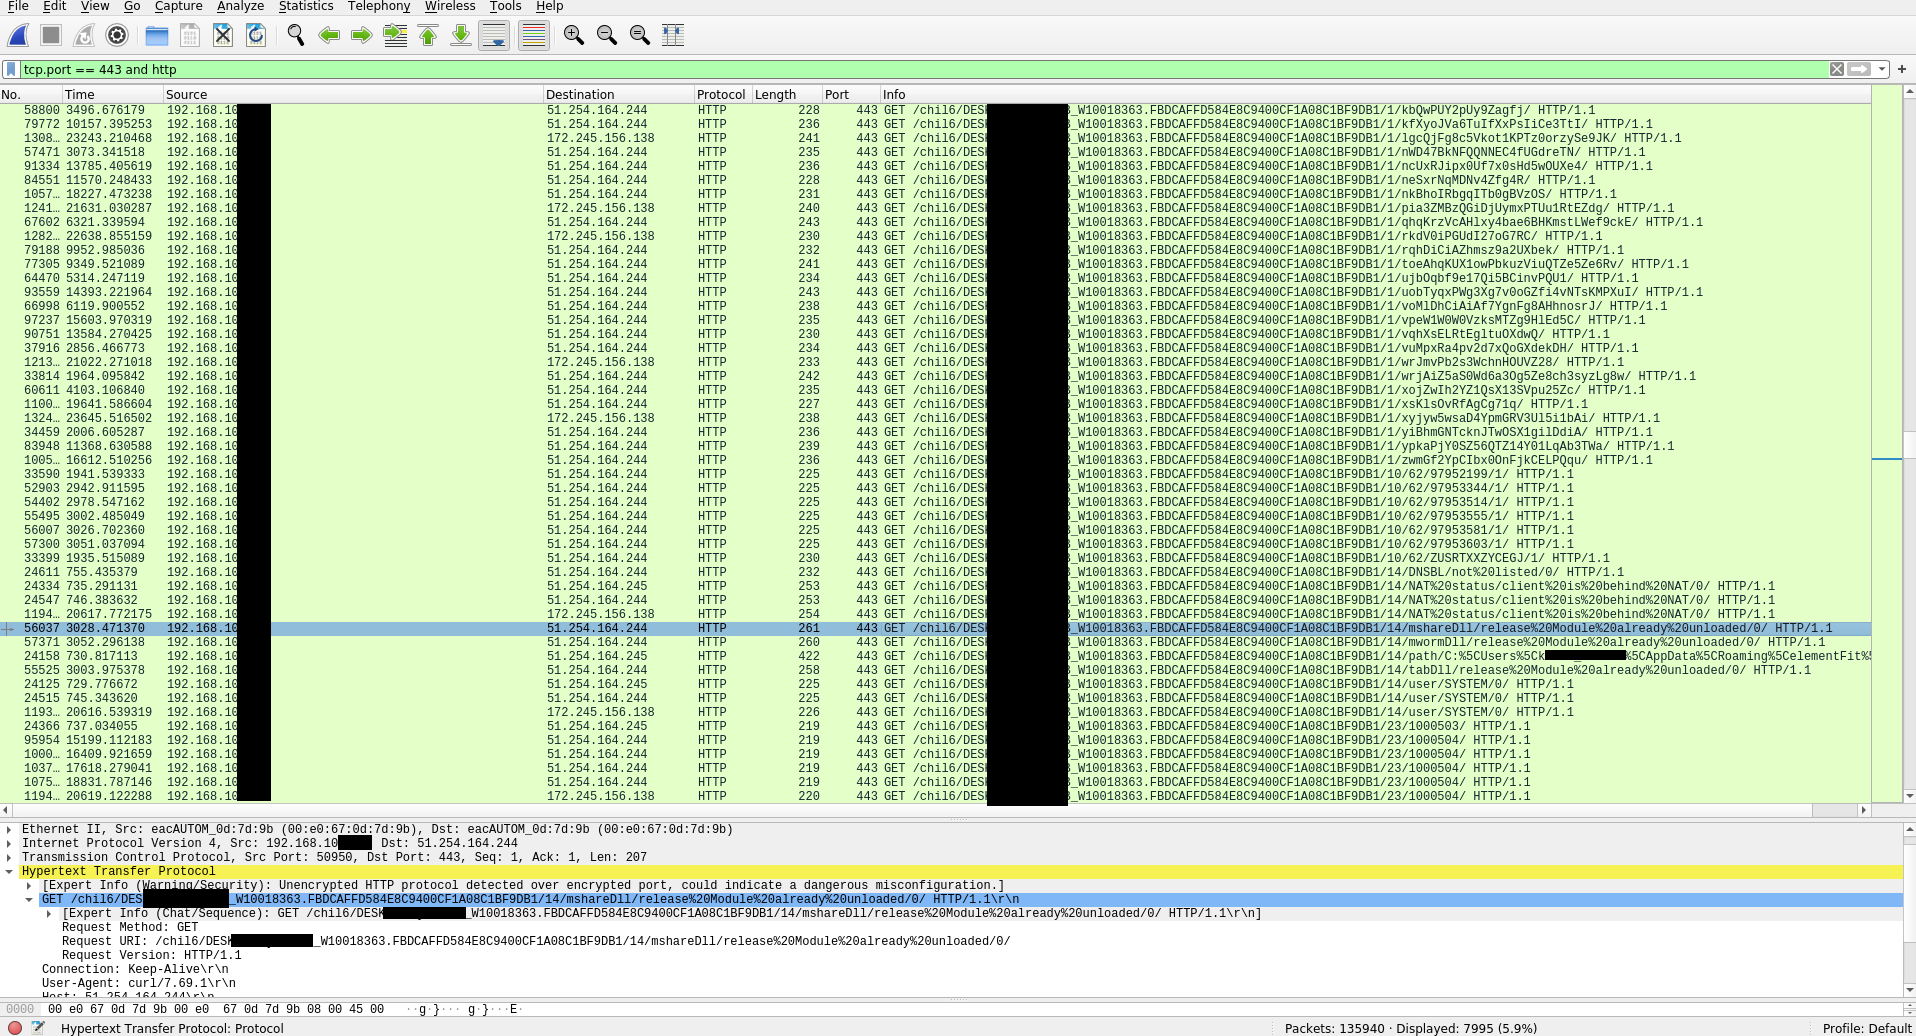
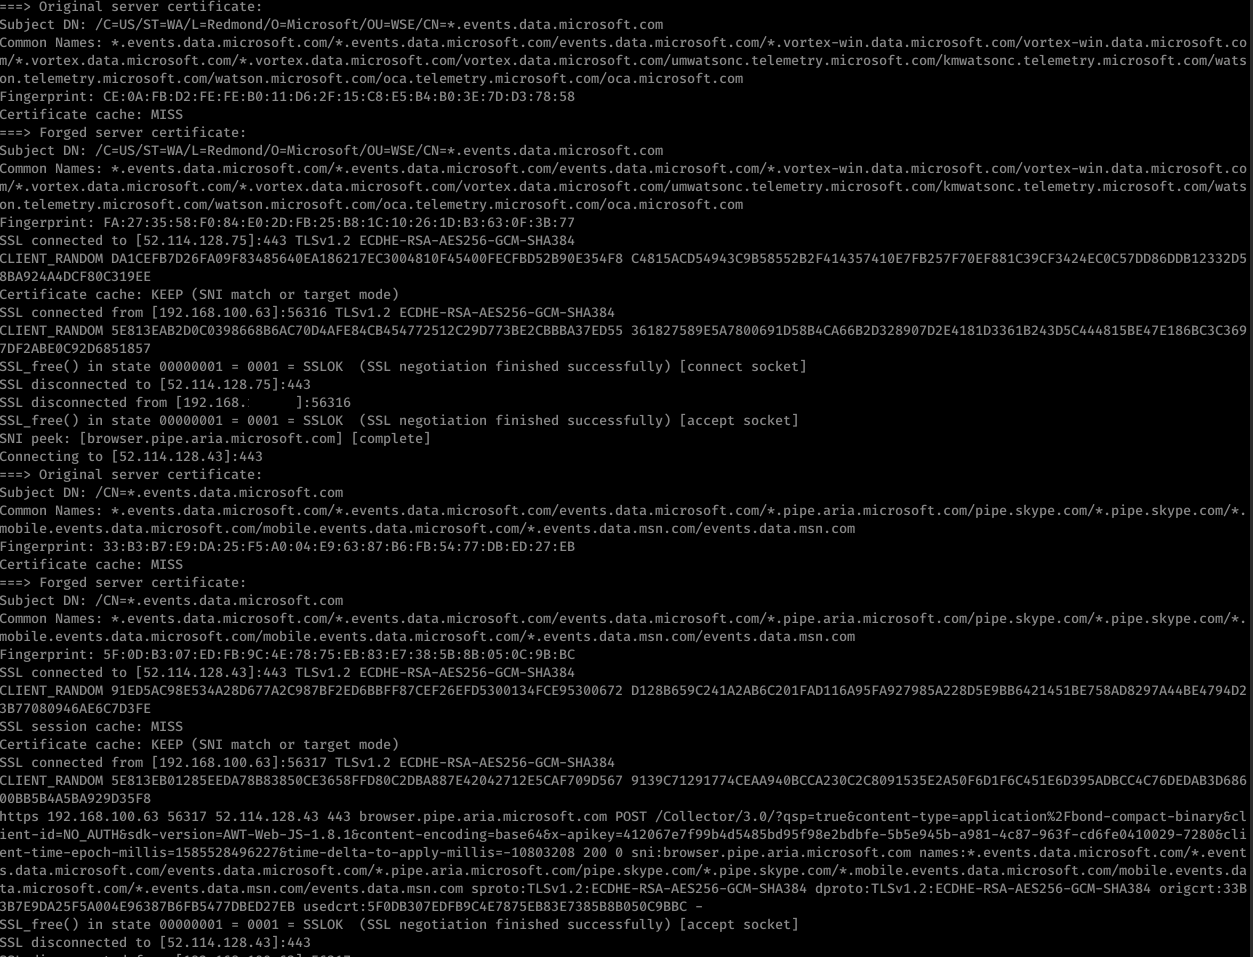
Now you should have it running in the background. For my example here I’ve sent the decrypted traffic back to the LAN interface which means the suricata IPS running on the interface will see the plaintext traffic in addition to the TLS encrypted traffic. Also now if I run any pcap off that interface I’ll see the same, both the TLS traffic and decrypted traffic. Here’s an example of TLS intercepted Trickbot traffic from a pcap captured on that LAN interface: