So last week I was looking to see what packages had updated for pfSense 2.4. And right at the top of the list I see one named Acme. Hmmm what could this be, well to my pleasant surprise pfSense is now compatible with obtaining and installing Let’s Encrypt certs.
So here’s a little guide on the process to enable signed Let’s Encrypt certs on your pfsense Web interface.
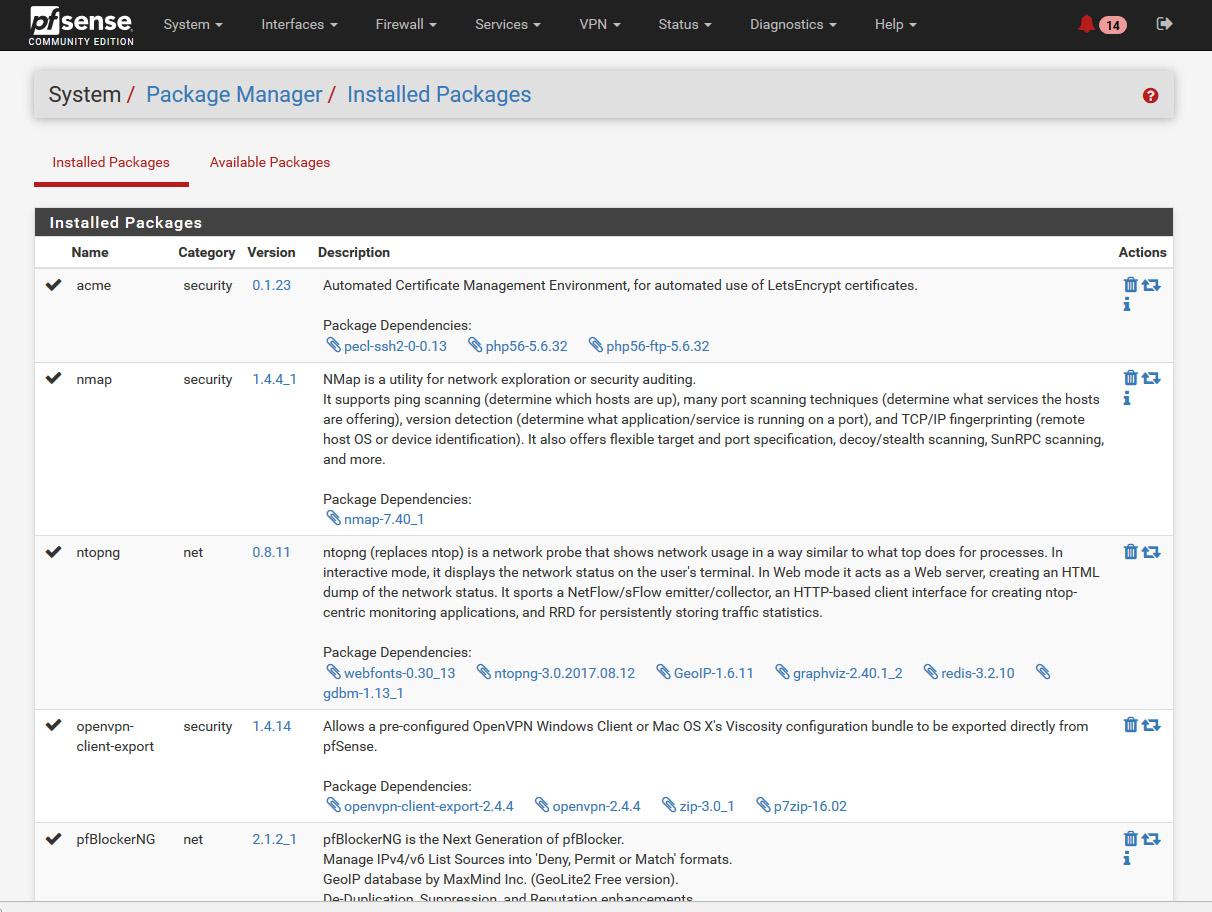
Step 1 head over to the package manager and install the acme package if you haven’t already.
Step 2 Go to Services > Acme and select the Account keys tab. Create a new key, this is the private key for your certs, don’t leak this. Also they have the ability to choose a test server or the production server, make sure to set to production server or the cert issues will not be trusted by browsers.

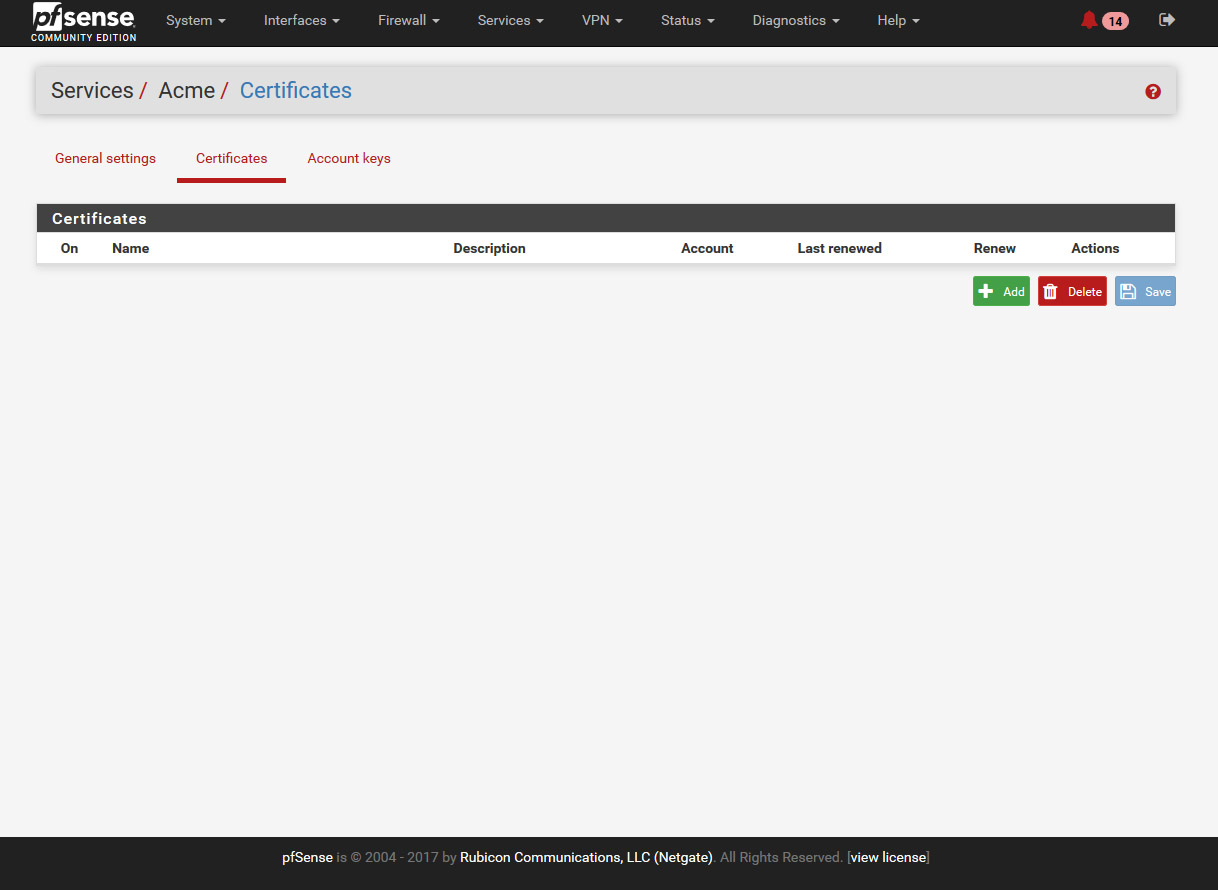
Step 3 Next hop over to the Certificates tab and hit add.
Step 4 Set a name and description, set to Active, select your key size 2048 is currently standard.
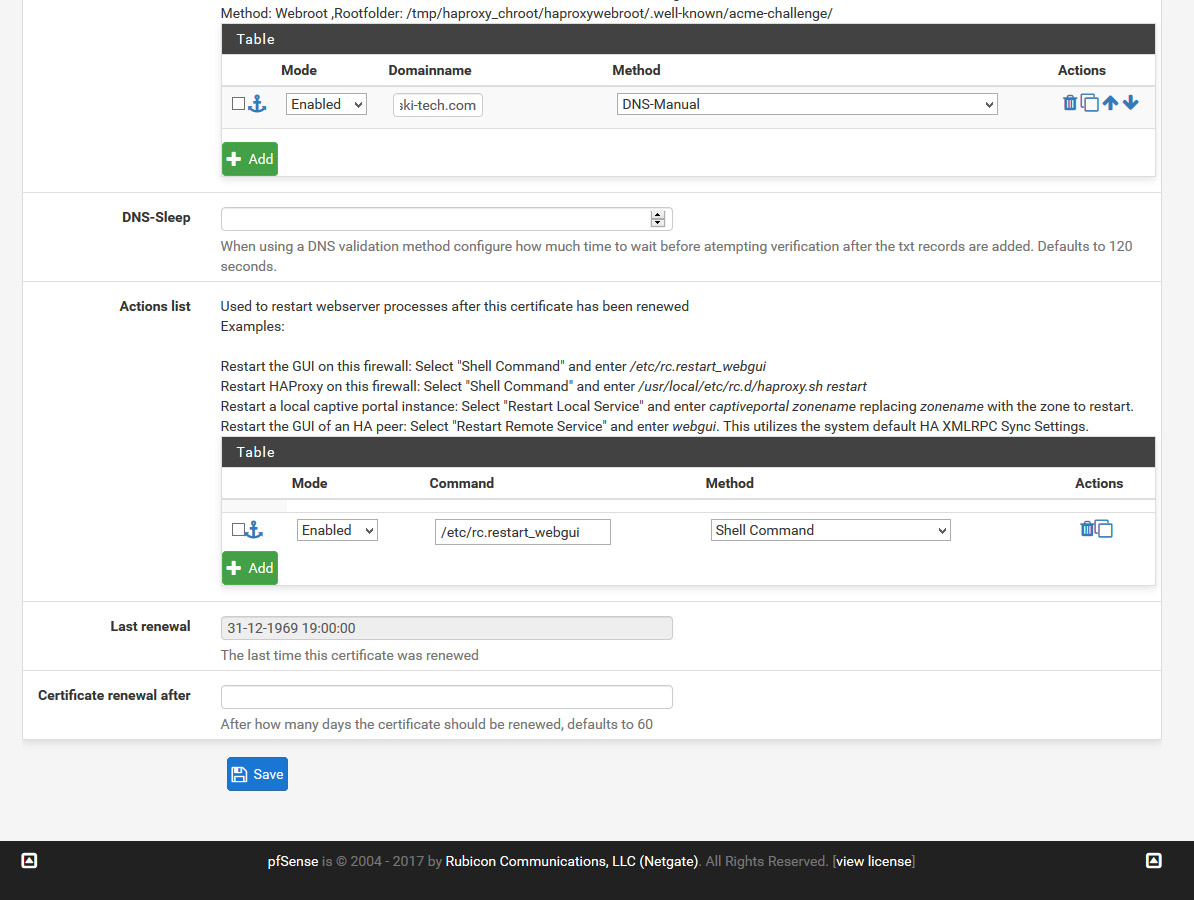
Set your domain SAN, for my router I am using router.laskowski-tech.com.
The method will be how the Let’s Encrypt server will validate that you control the domain before issuing the cert. I prefer the DNS method and went with manual for my DNS services are not integrated with the auto options in the list.
(DNS also due to the fact that my install is not internet accessible for the web interface, which is necessary for the web server validation options)

I also set the restart web gui shell command so that the web interface will load the new cert once it has obtained and installed it. If you do not do this the web interface will use the old cert until you restart the service.
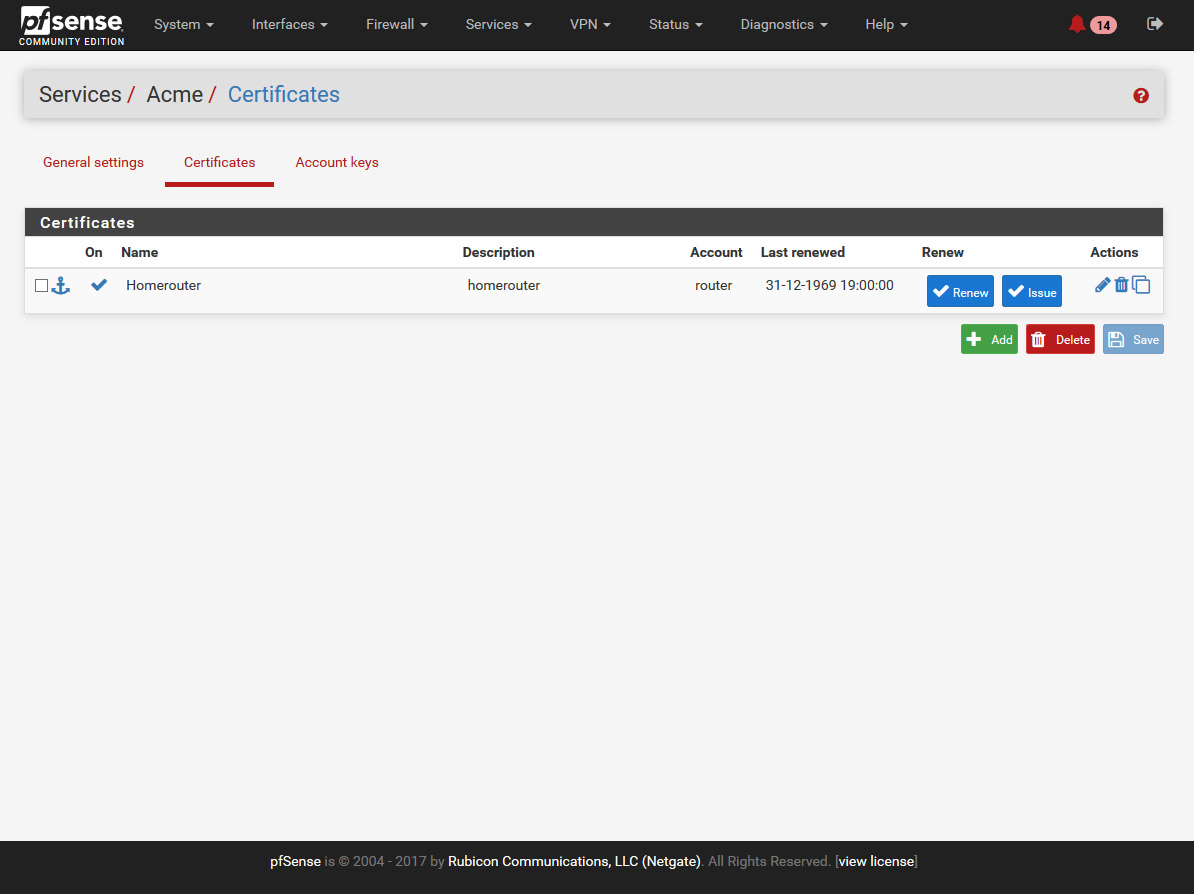
Step 5 Save everything and you should be back on the Certificates page. Select the Issue option to begin the cert order process.
Step 6 In this case due to the manual DNS selection the Issue option gives a code that I will need to add to my DNS zone as a TXT record. It will look like the following:
router.laskowski-tech.com 300 IN A TXT sadqweWQewQ(this is the code generated in the image below)FGsadGfd
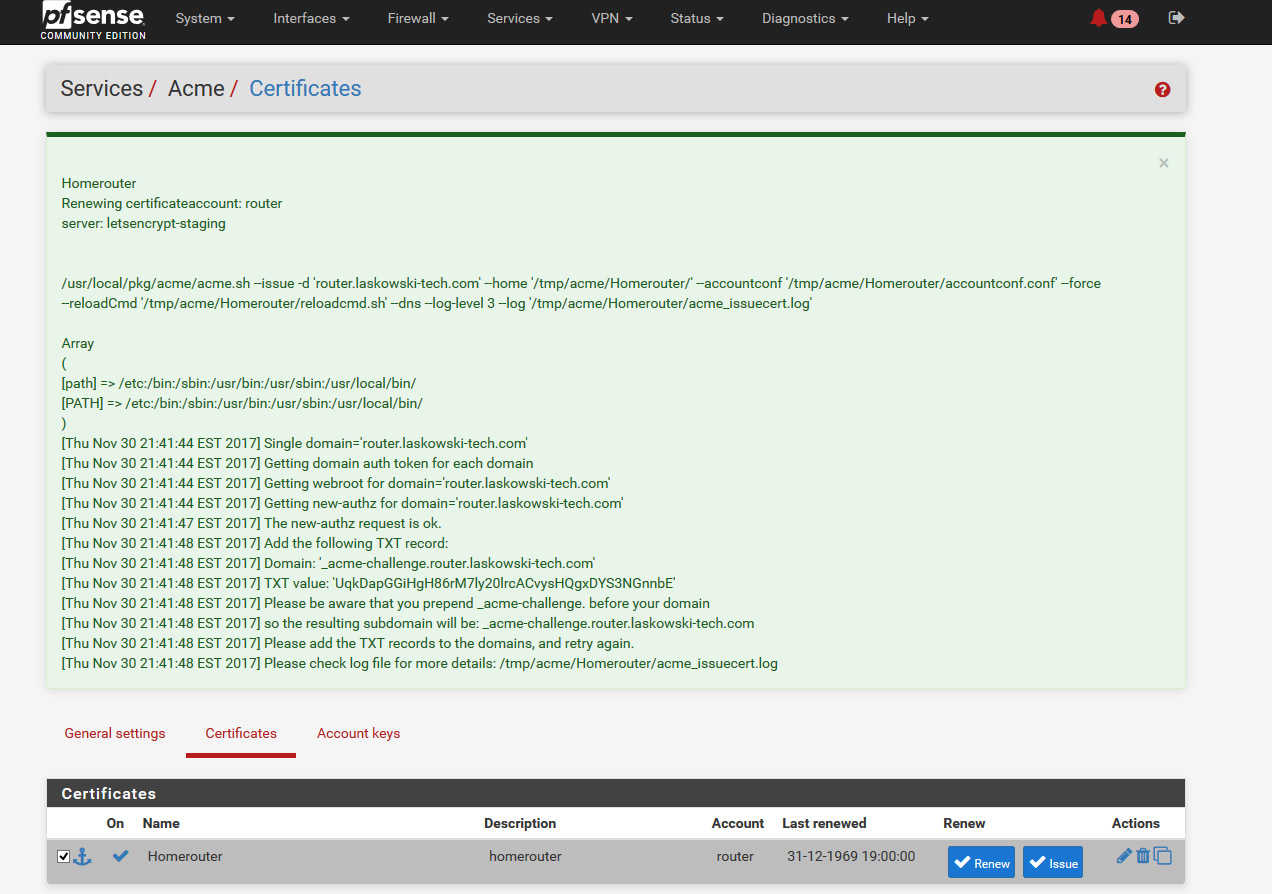
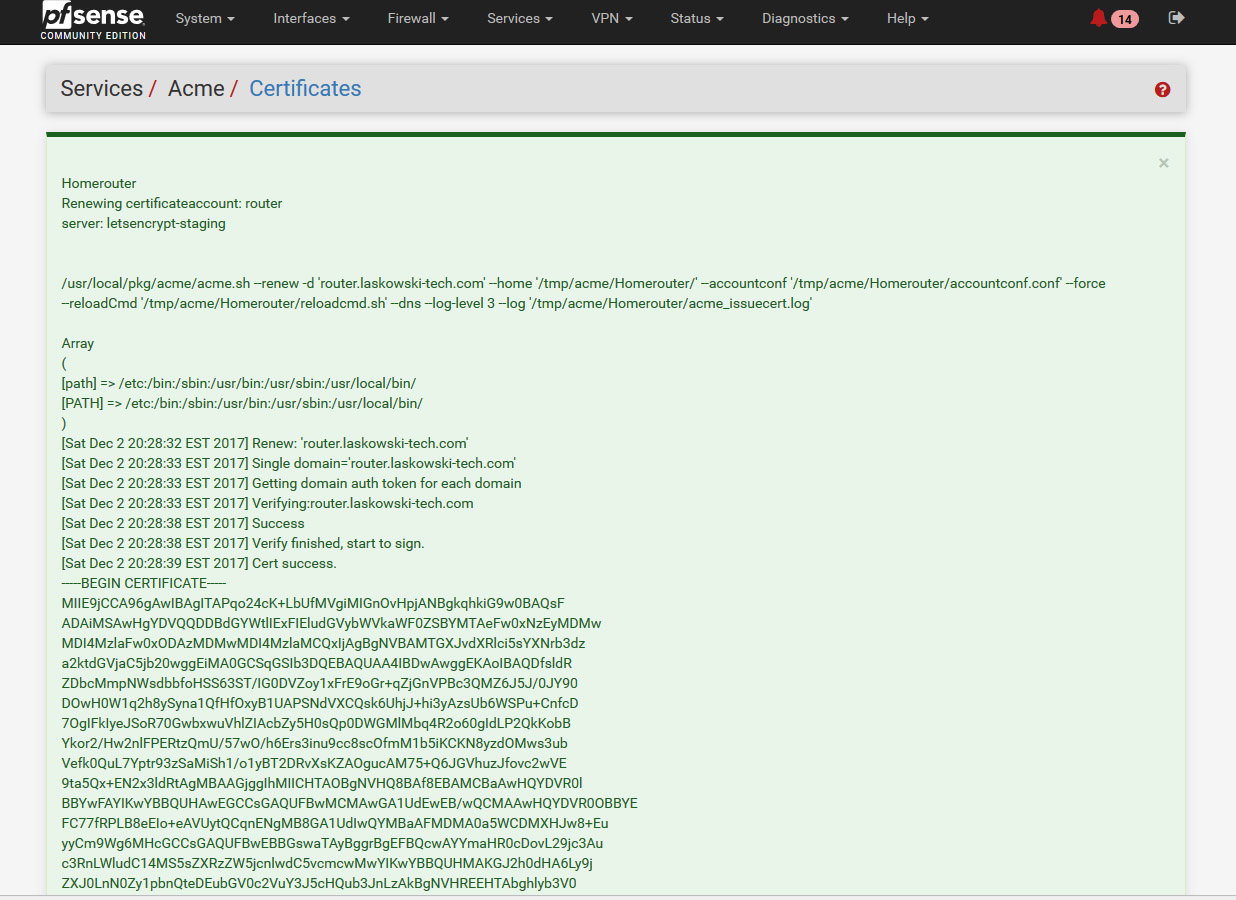
Step 7 So after a trip to my DNS provider later we return to the Certificates page and select Renew instead of issue this time and if all goes will you should see something like the following.
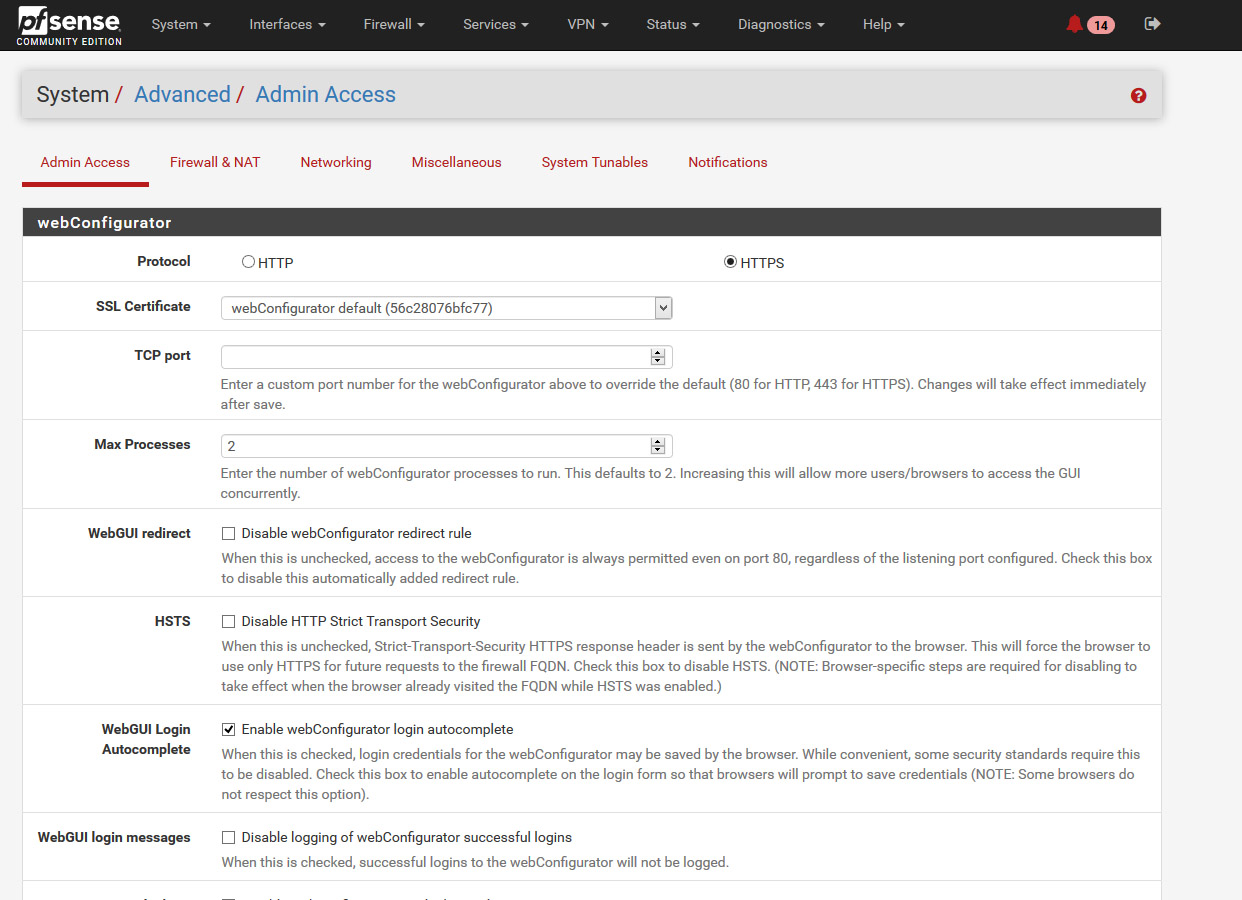
Step 9 Almost done, if this is the first time getting the Let’s Encrypt cert you will need to change the SSL cert used by the web panel. Do so by going to System > Advanced Settings > Admin Access and change the SSL cert from the default self signed cert to the new Let’s Encrypt cert.
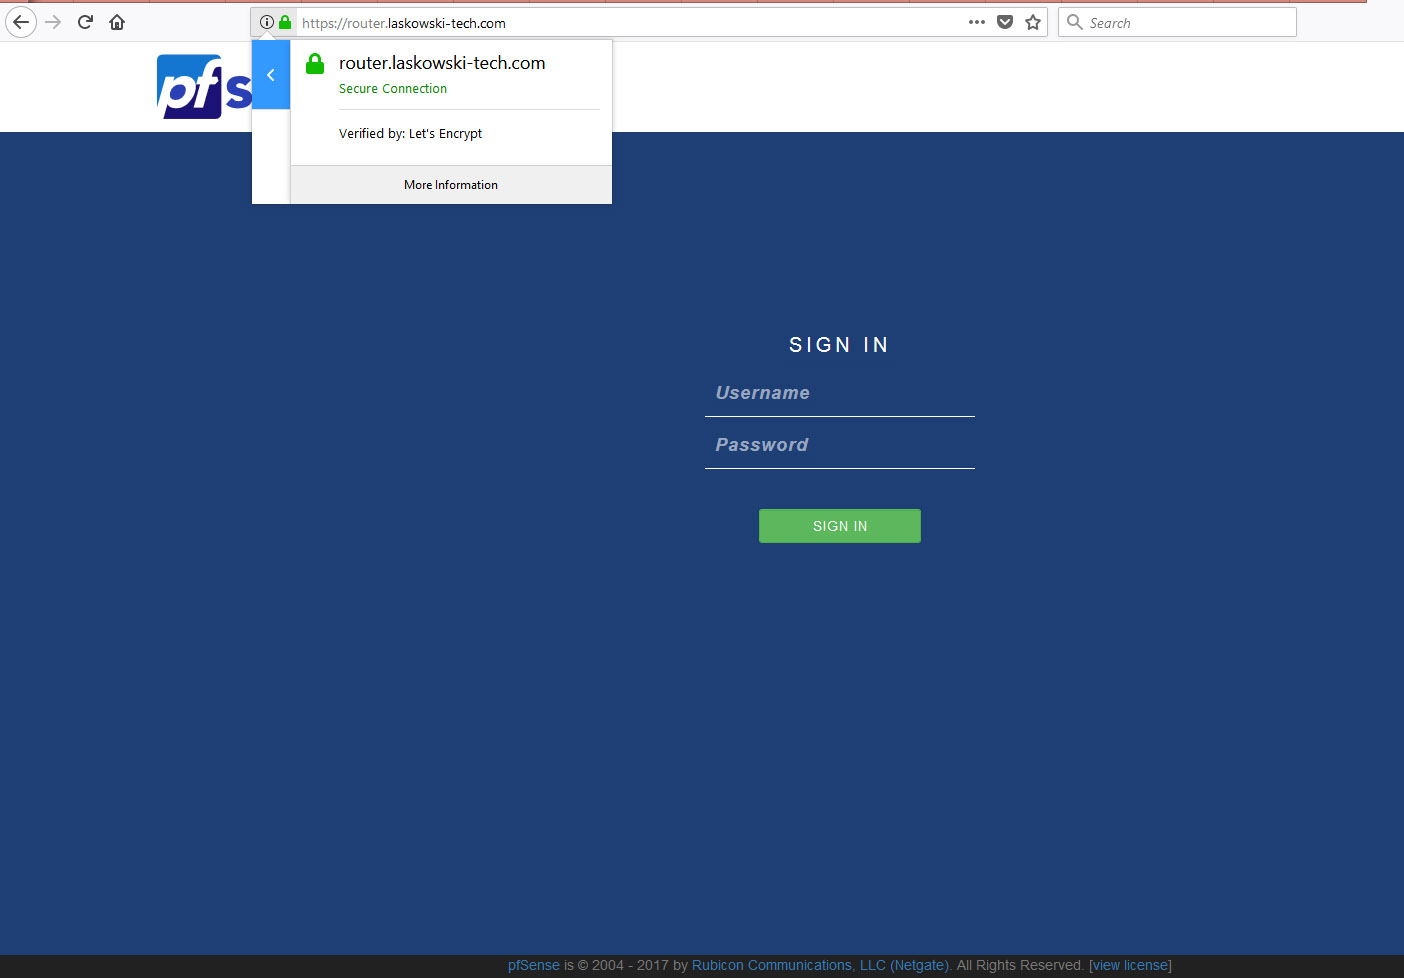
Step 10 Finally we should now be able to go check our work.
A few trouble shooting steps.
Make sure the web panel reboots or your new cert won’t get loaded.
Make sure DNS is set for the FQDN (fully qualified domain name)
Make sure the router name matches the cert name or the router will come up with a red page warning that there is a name mismatch and won’t allow you to proceed.
You can edit the name under System > General Settings.
Remember Let’s Encrypt certs are vaild for 90 days then need to be replaced, some of the options from step 4 will auto-renew others may need you to update with some manual intervention, so check to know which your is to keep the certs fresh.
Have other questions find me on twitter @laskow26.